
Booting NetBSD/VAX 1.5.3 from network on a MicroVAX 3300
Since I’ve owned my MicroVAX, it’s always had some kind of problem with its peripherals: someone had left the tape in the TK50 for years and it was completely seized, one of the RF30 DSSI drives was DOA, and the other one started acting up some years later rendering the system unusable. Since it’s one of my favorite machines, I’ve decided that one day or another I’d make it boot again: since a QBUS SCSI adapter and a SCSI2SD device could potentially cost me a grand, I’ve decided that the fastest and more flexible way to do so would be setting up a computer for booting it from the network.
So, after an insanely long time, I did it: here are my notes.
Planning
The VAXen were designed to be able to run as diskless nodes in clusters, so netbooting them is easy. Due to the fact that we’re still talking about a VAX, though, the process is not as straightforward as, say, launching tftpd and calling it a day: a lot of things can (and will) go wrong, as the MOP protocol is quite weird, and not being used to it can make the process look daunting.
It took me several tries to get this working: the first time I succeded, it was after spending an entire day looking at wireshark and nagging people who did this before me. Unluckily for past future me, I was so concentrated I forgot to write down the procedure, so when I attempted to migrate everything to the new NFS host, I wasted a couple of afternoons doing things wrong all over again.
Oh well, at least I took the time to write down notes this time.

Note to reader
If you’re willing to read through this document, please keep in mind that I’m using the following naming conventions:
edmonton.local.net,10.0.0.1is the NFS host;osiris.local.net,10.0.0.101is a Digital MicroVAX 3300.
Also, keep in mind that any “#” prompt means that you must run that command with sudo (not as root because in some places I assume that the environment is preserved).
Installing
Prerequisites
Packages
Since I started afresh, I had to install the following:
edmonton# apt install git build-essential
I’ve also installed net-tools and tcpdump because they can be quite handy, but they’re not required at all.
Networking
Since I’m running an ethernet cable directly between Edmonton’s port and the AUI transceiver on Osiris’ AUI, I had to configure a static IP address on said port. I changed the configuration (in /etc/network/interfaces) from something like this:
# The primary network interface
allow-hotplug enp3s0
iface enp3s0 inet dhcp
…to something like this:
# The primary network interface
# allow-hotplug enp3s0
auto enp3s0
iface enp3s0 inet static
	address 10.0.0.1/24
	up /usr/bin/ip link set enp3s0 promisc on
The last line enables promiscuous mode, which is needed for mopd to function correctly. To refresh the interface’s configuration, do the following:
edmonton# ifdown enp3s0
edmonton# ifup enp3s0
And we should be good to go.
mopd
The first component of our boot chain is the MOP (Maintenance Operations Protocol) daemon. The MOP was designed by Digital to provide the VAXen with advanced networking capabilities directly in ROM, and it serves about the same purpose of PXE. Digital used to provide MOP servers in the VMS operating system (VAXCluster) and in products like the InfoServer, but an open source implementation is available in the NetBSD source tree, and it’s been also ported to Linux.
First of all, we’re going to build the latest version of the NetBSD MOP daemon port from source:
edmonton$ git clone https://github.com/dreamlayers/netbsd-mopd.git
edmonton$ cd netbsd-mopd
edmonton$ make -f Makefile.linux
Now we need to prepare the MOP bootstrap loader. Boot up the VAX and issue:
>>> SHO ETH
Ethernet adapter
-ESA0 (08-00-2B-0F-CA-8C)
Be sure to jot down the MAC address, because we’ll need it to boot the system. It’s time to download the MOP loader: I’ve chosen to use NetBSD 1.5.3 because it’s the last 1.x release to include a MOP loader (which could be used with later versions as well) and it’s not too heavy.
edmonton$ wget http://archive.netbsd.org/pub/NetBSD-archive/NetBSD-1.5.3/vax/installation/netboot/boot.mop
edmonton$ file boot.mop
boot.mop: data
If you’re going for later versions of NetBSD, make sure that the file is reported as “data” and not as “ELF 32-bit LSB executable” as the boot file provided by releases 1.6+. I’m not completely sure why my VAX’s firmware won’t load the latter, but it’s not a concern as it looks like the old MOP loader can boot any kernel.
The MOP daemon, by default, looks for the loader in the /tftpboot/mop folder: you can change the path with a command line switch but I frankly had no reason to do so. Also keep in mind that mopd is quite picky about this file’s whereabouts, so it’s mandatory to follow this naming convention (lowercase MAC without dashes, uppercase .SYS extension).
edmonton# mkdir -p /tftpboot/mop
edmonton# mv boot /tftpboot/mop/08002b0fca8c.SYS
tftpboot
The next parts of the boot chain are bootp and tftpd, and they must be up and running to provide the VAX with the MOP loader. Luckily, they’re quite easy to set up (they’re BSD-style inetd components after all). First of all, let’s fetch them from our package manager:
edmonton# apt install tftpd bootp
Now we need to make sure that the tftp line in /etc/inetd.conf looks like this (note /tftpboot at the end), and add an entry for bootpd…
edmonton# cp /etc/inetd.conf /etc/inetd.conf.bak
edmonton# cat /etc/inetd.conf | grep tftp
tftp		dgram	udp	wait	nobody	/usr/sbin/tcpd	/usr/sbin/in.tftpd /tftpboot
edmonton# "echo bootps		dgram	udp	wait	root	/usr/sbin/bootpd	bootpd" >> /etc/inetd.conf
…and add the following to /etc/bootptab:
osiris.local.net:\
	:ht=ether:\
	:ha=08002B0FCA8C:\
	:ip=10.0.0.101:\
	:bf=/tftpboot/boot.netbsd:\
	:rp=/export/client/root/:
This might look a bit like black magic, so let’s dissect it:
osiris.local.netis the hostname of the target,ht=ethertellsbootpthat we’re using ethernet,ha=is the MAC address of the target,ip=is the IP of the target,bf=is apparently ignored,rp=is the local path that the target will use as a root partition via NFS.
While we are at it, I opted to add the following to /etc/hosts for convenience:
10.0.0.101 osiris.local.net
..and we’re done! Let’s restart the inetd superserver:
edmonton# service inetd restart
Testing mopd
Now we’re ready to test mopd, let’s start it with the counter-intuitively named -d flag:
edmonton# cd /home/user/netbsd-mopd
edmonton# ./mopd/mopd -d enp3s0
mopd: not running as daemon, -d given.
Now, we can tell the VAX to:
>>>B ESA0
(BOOT/R5:0 ESA0)


  2..
-ESA0
  1..0..

>> NetBSD/vax boot [Nov 17 2000 07:23:42]
>> Press any key to autoboot 3
Trying BOOTP
Using IP address: 10.0.0.101
myip: (10.0.0.101)
root addr=10.0.0.1 path=/export/client/root
<Ctrl-C>

?02 EXT HLT
		PC = 002F3426
At the same time, you should see this on the host’s console:
MOP DL 8:0:2b:f:ca:8c   > ab:0:0:1:0:0      len   11 code 08 RPR
MOP DL 0:e0:4c:d2:46:d7  > 8:0:2b:f:ca:8c   len    1 code 03 ASV
MOP DL 8:0:2b:f:ca:8c   > 0:e0:4c:d2:46:d7  len   11 code 08 RPR
Native Image (VAX)
Header Block Count: 1
Image Size:         00011400
Load Address:       00000000
Transfer Address:   00000000
MOP DL 0:e0:4c:d2:46:d7  > 8:0:2b:f:ca:8c   len 1006 code 02 MLD
MOP DL 8:0:2b:f:ca:8c   > 0:e0:4c:d2:46:d7  len    3 code 0a RML
MOP DL 0:e0:4c:d2:46:d7  > 8:0:2b:f:ca:8c   len 1006 code 02 MLD
MOP DL 8:0:2b:f:ca:8c   > 0:e0:4c:d2:46:d7  len    3 code 0a RML
MOP DL 0:e0:4c:d2:46:d7  > 8:0:2b:f:ca:8c   len 1006 code 02 MLD
MOP DL 8:0:2b:f:ca:8c   > 0:e0:4c:d2:46:d7  len    3 code 0a RML
<...>
MOP DL 0:e0:4c:d2:46:d7  > 8:0:2b:f:ca:8c   len 1006 code 02 MLD
MOP DL 8:0:2b:f:ca:8c   > 0:e0:4c:d2:46:d7  len    3 code 0a RML
MOP DL 0:e0:4c:d2:46:d7  > 8:0:2b:f:ca:8c   len  662 code 02 MLD
MOP DL 8:0:2b:f:ca:8c   > 0:e0:4c:d2:46:d7  len    3 code 0a RML
MOP DL 0:e0:4c:d2:46:d7  > 8:0:2b:f:ca:8c   len   32 code 14 PLT
MOP DL 8:0:2b:f:ca:8c   > 0:e0:4c:d2:46:d7  len    3 code 0a RML
As you can see, the VAX has got the correct parameters from bootp and is trying to load files from an NFS share without success, which is good, because we haven’t set NFS up yet!
Setting up NFS
NFS (Network File System) is a godsend file sharing protocol developed by Sun Microsystems for mapping drives that are physically located on different machines as they were local. This transparency can be leveraged in many different ways, like having home directories located on a safe remote system or booting without a disk drive, which is exactly what we’re trying to do. The MV3300’s LANCE ethernet adapter is not fast by any means, but it will let us use the system, at the very least, without a hitch. lets
As usual, we need to install NFS: in this case, however, we can either choose the kernel-based server or the userspace-based one. I went with the former as it’s the one I’m used to, but I’ve never tried the userspace one so I can’t really vouch for one or the other.
edmonton# apt install nfs-kernel-server
We can start by creating the appropriate folder structure and an inode for the console device (we won’t get any output if we don’t), and by initializing a 16MB swap file:
edmonton# mkdir -p /export/client/{root,usr,home}
edmonton# mknod /export/client/root/dev/console c 0 0
edmonton# mkdir /export/client/root/swap
edmonton# dd if=/dev/zero of=/export/client/swap bs=4k count=4k
Now let’s add the following entries to the /etc/exports file, which is kinda an fstab for exported directories:
/export/client/swap osiris.local.net(rw,no_root_squash)
/export/client/root osiris.local.net(rw,no_root_squash)
/export/client/usr osiris.local.net(rw,root_squash)
/export/client/home osiris.local.net(rw,root_squash)
…and inform the NFS server of the changes:
edmonton# exportfs -ra
exportfs: /export/client/swap is not a directory. Remote access will fail
The complaint can be safely ignored as we are indeed exporting the swap file and we have no intention to access it directly.
2020-05-07:jack23247 While we ignore the issue, systemd won’t: if you don’t edit the unit file, the
nfs-kernel-serverservice will fail miserably. Do the following:edmonton# systemctl edit --full nfs-kernel-server.serviceAnd prepend a
-to all the lines pertaining toexportfs, making sure that they look like this:ExecStartPre=-/usr/sbin/exportfs -r ExecStopPost=-/usr/sbin/exportfs -au ExecStopPost=-/usr/sbin/exportfs -f ExecReload=-/usr/sbin/exportfs -rThis tells
systemdto ignore the non-zero exit code ofexportfswhile starting the service, thus renderingnfs-kernel-serverusable, see https://man7.org/linux/man-pages/man5/systemd.service.5.html for more details.Now you can restart the NFS server and look at the status:
edmonton# service nfs-kernel-server restart
edmonton# service nfs-kernel-server status
● nfs-server.service - NFS server and services
   Loaded: loaded (/etc/systemd/system/nfs-server.service; enabled; vendor preset: enabled)
   Active: active (exited) since Fri 2021-05-07 00:14:32 CEST; 3s ago
  Process: 1839 ExecStartPre=/usr/sbin/exportfs -r (code=exited, status=1/FAILURE)
  Process: 1840 ExecStart=/usr/sbin/rpc.nfsd $RPCNFSDARGS (code=exited, status=0/SUCCESS)
 Main PID: 1840 (code=exited, status=0/SUCCESS)

mag 07 00:14:31 edmonton systemd[1]: Starting NFS server and services...
mag 07 00:14:31 edmonton exportfs[1839]: exportfs: /export/client/swap is not a directory. Remote access will fail
mag 07 00:14:32 edmonton systemd[1]: Started NFS server and services.
As you can see, the server is active even if
ExecStartPrereports a failure (which is just theRemote access will failwarning), unlike it was before.
If you’re using most recent Linux distributions, NFSv2 will be disabled by default for security reasons. If your VAX cannot boot and complains about a
callrpc: error = 2, add the following line to/etc/default/nfs-kernel-server:RPCNFSDOPTS="--nfs-version 2,3,4 --syslog"…and restart the
nfs-kernel-serverservice. This enables NFSv2 and turns on logging so you can see what’s going on withjournalctl.
Getting the distribution ready
Setting up a NetBSD distribution is as simple as downloading the appropriate tarballs and unpacking them in the right place. Of course, there is some customization involved, but it’s pretty much painless (almost like working in a chroot).
Downloading and unpacking the sets
Let’s start by downloading the required tarballs:
edmonton$ cd ~
edmonton$ mkdir -p NetBSD-1.5.3/vax/binary/sets/
edmonton$ cd NetBSD-1.5.3/vax/binary/sets/
edmonton$ wget http://archive.netbsd.org/pub/NetBSD-archive/NetBSD-1.5.3/vax/binary/sets/{base,etc,kern}.tgz
Then we can select a few of the optional ones:
edmonton$ wget http://archive.netbsd.org/pub/NetBSD-archive/NetBSD-1.5.3/vax/binary/sets/{comp,man,misc,text}.tgz
Now, we need to unpack everything in the right place (the --numeric-owner switch is necessary to keep uids and gids intact):
edmonton# cd /export/client/root
edmonton# tar --numeric-owner -xvpzf ~/NetBSD-1.5.3/vax/binary/sets/kern.tgz
edmonton# tar --numeric-owner -xvpzf ~/NetBSD-1.5.3/vax/binary/sets/base.tgz
edmonton# tar --numeric-owner -xvpzf ~/NetBSD-1.5.3/vax/binary/sets/etc.tgz
edmonton# tar --numeric-owner -xvpzf ~/NetBSD-1.5.3/vax/binary/sets/man.tgz
edmonton# tar --numeric-owner -xvpzf ~/NetBSD-1.5.3/vax/binary/sets/text.tgz
edmonton# tar --numeric-owner -xvpzf ~/NetBSD-1.5.3/vax/binary/sets/comp.tgz
edmonton# tar --numeric-owner -xvpzf ~/NetBSD-1.5.3/vax/binary/sets/misc.tgz
Since the usr directory is part of the base set, we need to move it over to /export/client/usr. Let’s do just that:
edmonton# mv usr/* ../usr/
…and we have installed NetBSD successfully!
Configuring
Off-line configuration
Before we tell our VAX to B ESA0 again, we need to change some configuration files in the export’s /etc directory.
Networking
First, we need a configuration file for our network interface: in my case it’s called le0 (LANCE Ethernet #0) by the kernel. Thus, we need to do the following (be sure to use the correct IP address):
edmonton# echo "inet client netmask 255.255.255.0 broadcast 10.0.0.101" > /export/client/root/etc/ifconfig.le0
Now we need to tell the system that it’s booting off the network, and to do that we edit rc.conf, which is BSD’s central config hub. Make sure that /export/client/root/etc/rc.conf contains the following:
hostname="osiris"
defaultroute="10.0.0.1"
nfs_client=YES
auto_ifconfig=NO
net_interfaces=""
It’s important to disable the automatic network configuration process so we don’t get disconnected while booting. Now, let’s wrap it up by editing /etc/hosts accordingly. In my case, I added the following:
10.0.0.101	osiris.local.net	osiris
10.0.0.1	edmonton.local.net	melchior
Filesystem
The last thing we have to do before being able to netboot is creating the client’s fstab file, containing the following (be sure to use the correct IP addresses):
10.0.0.1:/export/client/swap   none  swap  sw,nfsmntpt=/swap
10.0.0.1:/export/client/root   /     nfs   rw 0 0
10.0.0.1:/export/client/usr    /usr  nfs   rw 0 0
10.0.0.1:/export/client/home   /home nfs   rw 0 0
…and thus we’re ready for our first boot!
First boot and on-line configuration
If everything went well, you should see something like this:
>>>B ESA0
(BOOT/R5:0 ESA0)
2..
-ESA0
1..0..
>> NetBSD/vax boot [Nov 17 2000 07:23:42] <<
>> Press any key to abort autoboot 0
Trying BOOTP
Using IP address: 10.0.0.101
myip: (10.0.0.101)
root addr=10.0.0.1 path=/export/client/root/
open netbsd.vax: No such file or directory
> boot netbsd
1174268+57032+195096+[85608+100959]=0x189ca7
[ preserving 186567 bytes of netbsd a.out symbol table ]
Copyright (c) 1996, 1997, 1998, 1999, 2000, 2001
The NetBSD Foundation, Inc. All rights reserved.
Copyright (c) 1982, 1986, 1989, 1991, 1993
The Regents of the University of California. All rights reserved.
NetBSD 1.5.3 (GENERIC) #5: Mon Jul 1 23:34:54 CEST 2002
he@turing.urc.uninett.no:/usr/src/sys/arch/vax/compile/GENERIC
MicroVAX 3300/3400
cpu: KA640, CVAX microcode rev 4 Firmware rev 65
total memory = 36800 KB
avail memory = 30928 KB
using 485 buffers containing 1940 KB of memory
mainbus0 (root)
ibus0 at mainbus0
le0 at ibus0: vec 324 ipl 17
le0: address 08:00:2b:0f:ca:8c
le0: 32 receive buffers, 8 transmit buffers
uba0 at ibus0: Q22
dhu0 at uba0 csr 160440 vec 300 ipl 17
dhu0: rom(1) version 17 rom(0) version 18
dhu0: DHV-11
boot device: le0
root on le0
nfs_boot: trying DHCP/BOOTP
nfs_boot: DHCP server: 10.0.0.1
nfs_boot: my_addr=10.0.0.101
nfs_boot: my_mask=255.0.0.0
root on edmonton.local.net:/export/client/root/
root file system type: nfs
Automatic boot in progress: starting file system checks.
Setting tty flags.
chmod: /dev/tty[pqrs]*: No such file or directory
Setting sysctl variables:
Starting network.
Hostname: osiris
add net 127.0.0.0: gateway 127.0.0.1
add net fe80::: gateway ::1
add net fec0::: gateway ::1
add net ::ffff:0.0.0.0: gateway ::1
add net ::224.0.0.0: gateway ::1
add net ::127.0.0.0: gateway ::1
add net ::0.0.0.0: gateway ::1
add net ::255.0.0.0: gateway ::1
add net 2002:e000::: gateway ::1
add net 2002:7f00::: gateway ::1
add net 2002:0000::: gateway ::1
add net 2002:ff00::: gateway ::1
add net ::0.0.0.0: gateway ::1
IPv6 mode: host
Configuring network interfaces:.
add net default: gateway 10.0.0.1
Building databases...
Starting syslogd.
Checking for core dump...
savecore: /netbsd: kvm_openfiles: /dev/mem: No such file or directory
Mar 19 02:01:31 osiris savecore: /netbsd: kvm_openfiles: /dev/mem: No such file or directory
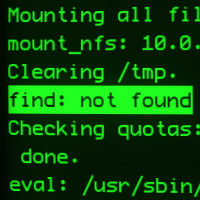
Mounting all filesystems...
Clearing /tmp.
Checking quotas: done.
Setting securelevel: kern.securelevel: 0 -> 1
swapctl: /swap is readable by the world
swapctl: adding 10.0.0.1:/export/client/swap as swap device at priority 0
Creating runtime link editor directory cache.>
Updating motd.
starting local daemons:.
Starting inetd.
Starting cron.
Fri Mar 19 02:03:04 PST 2021
NetBSD/vax (osiris) (console)
login:
Success! Let’s finalize the installation: we login as root and , when asked for our terminal type, we specify vt100. The first thing we need to do is telling the system to create the device files:
osiris# cd /dev
osiris# /bin/sh MAKEDEV all
This will take a couple minutes, so pour yourself some coffee and relax. When it’s done, we can finally edit rc.conf to tell the system that we’re done with configuration by changing rc_cofigured=NO to YES. Once it’s done, you can either reboot the system or exit, and it should continue booting.
In my case, the terminal was not configured correctly, and the following happened:
osiris# vi /etc/rc.conf
ex/vi: terminal type unknown
This happens because the
TERMenvironment variable remainsunknown, but you can manually fix that by:osiris# unsetenv TERM osiris# setenv TERM vt100Now
vishould be fine. To avoid doing this all the time, I recommend adding at leastsetenvto your user’s.cshrc.
Setting up your user
Setting up the profile isn’t as straightforward as one might think: first of all, the -m option fails, because we are running on a share. You can try for yourself:
osiris# useradd -G wheel -m quartz
mkdir: /home/quartz: Permission denied
useradd: [Warning] can't system `/bin/mkdir -p /home/quartz'
useradd: can't mkdir `/home/quartz': No such file or directory
We’re not able to mkdir directly in the /home directory, so we must resort to using the host for this:
edmonton# mkdir /export/client/home/quartz
edmonton# sudo chown quartz:staff /export/client/home/quartz
…and now it should be possible to create and use the profile:
osiris# useradd -G wheel quartz
osiris# exit
osiris# logout

NetBSD/vax (osiris) (console)

login: quartz
Password:
Copyright (c) 1996, 1997, 1998, 1999, 2000
        The NetBSD Foundation, Inc.  All rights reserved.
Copyright (c) 1980, 1983, 1986, 1988, 1990, 1991, 1993, 1994
        The Regents of the University of California.  All rights reserved.

NetBSD 1.5.3 (GENERIC) #5: Mon Jul  1 23:34:54 CEST 2002

Welcome to NetBSD!

%
Remember to run both your user and
rootthroughpasswdbefore using the system!
To test out whether or not you’ve got the right permissions on your home directory, I did this:
% echo "Hello from NetBSD/VAX!" > afile.bbk
% cat afile.bbk
Hello from NetBSD/VAX!
…and compiled a little C program:
% cc -o test test.c
% ./test
Hello from NetBSD/VAX's C compiler!
%
So we’re finally done, enjoy NetBSD on your VAX!
Shutting down
While we’re at it, let’s (rather satisfyingly) shut it all down:
% su
Password:
Mar 19 03:45:09 osiris su: quartz to root on /dev/console
osiris# shutdown -h now
Shutdown NOW!
shutdown: [pid 176]
osiris#
*** FINAL System shutdown message from quartz@osiris ***
System going down IMMEDIATELY


Mar 19 03:45:18 osiris shutdown: halt by quartz:

System shutdown time has arrived

About to run shutdown hooks...
Stopping cron.
Stopping inetd.
Fri Mar 19 03:45:36 PST 2021

Done running shutdown hooks.
Mar 19 03:45:42 osiris syslogd: exiting on signal 15
syncing disks... 2 2 done

?06 HLT INST
        PC = 8010BC5F
>>>I

>>>
*clunk*
Sources
In this specific order: